The goal of a match
Destroy every enemy ship. That ends the match at once. If both fleets are still flying when the match clock reaches zero, the winner is decided on points:
- Damage counts most (70%). It is measured against what the enemy brought: the share of their fleet's starting hull and shield you destroyed, so a fighter swarm is not punished for facing a titan.
- Ore mined counts too (30%). Your ore compared with the better miner of the two sides.
- If that is level, the side with more of its own hull and shield left wins. If that is level too, it is a draw.
The clock is 10 minutes for 1v1, 15 for 2v2 and 20 for 3v3. A single-player battle uses the 1v1 clock.
Build your fleet
Every player fields one fleet of up to 145 fleet points. A hull's cost is set only by its size class, and it is the square of the class tier, the same table SAGE uses. A Titan costs as much as 81 of the smallest fighters.
- 1XXS
- 4XS
- 9S
- 16M
- 25L
- 36CAP
- 49CMD
- 81TTN
Some legal 145-point fleets: one Titan, one Capital, one Large and three Smalls; one Commander, two Capitals, a Medium and two Smalls; or 145 of the smallest fighters. Composition is the whole decision.
On the fleet select screen
- Click a ship card to add that hull to your fleet. The points used and remaining are shown as you build, and LAUNCH stays disabled while you are over budget.
- Your ships line up in the YOUR FLEET strip. Click a ship there to edit its picked abilities; click its X to remove it and get its points back.
- Pick three abilities per hull. Under ABILITIES, click one of the three CHOOSE boxes, then an icon in the grid. Every copy of that hull uses the same picks, and an empty slot stays empty. See Abilities.
- Press HELP to read the full control list before you go.
- Press LAUNCH. The battle starts when every player's fleet is in.
Camera
Move, orbit and zoom the view. None of these give orders.
- WASD
- Pan, relative to where you are looking: W is always into the screen.
- QE
- Orbit the camera left or right.
- Shift+ left-drag
- Orbit in any direction: drag up to look from below, down for a top-down view.
- Right-drag / middle-drag
- Orbit the camera. A right click without dragging is a move order instead.
- Mouse wheel
- Zoom along your view.
- F
- Focus the camera on your selection and follow it. While focused, right-drag orbits around the ships and the wheel sets the orbit distance. Press F again to re-centre; any WASD pan hands the camera back to you.
- Minimap
- Click or drag on the minimap (bottom right) to move the camera there.
Select ships, give orders
Pick ships, tell them where to go and whom to shoot. Every ship fires at the nearest enemy on its own; orders decide position and focus.
Selecting
- Left click
- Select the ship under the cursor.
- Left-drag
- Box-select your ships.
- Ctrl+ left click
- Add a ship to the selection, or remove it.
- Double-click a ship
- Select every ship of that class in your fleet.
- 0
- Select your whole fleet.
- Ctrl+1 to 9
- Assign the selected ships to a control group. A ship belongs to one group, and its number shows on its box in the fleet bar.
- 1 to 9
- Recall that group. Tap the number twice to recall it and focus the camera on it.
Moving and attacking
- Right-click space
- Move order. Each ship keeps its own altitude.
- Space+ wheel
- Raise or lower the selected ships' destination (45 degree maximum climb).
- Shift+ right-click
- Queue a waypoint. Keep Shift-clicking to add legs; the next plain right-click is the final leg. A new Shift-click after that starts a fresh route.
- Right-click an enemy
- Attack order: the selected ships pursue it and focus their fire on it.
- Right-click a big rock
- With mining ships selected: fly there and mine. See Mining.
The Command Table: orders for a group
Select two or more ships and the detail bay at the bottom of the screen becomes the Command Table: a hologram of the group, a roster (click a chip to select just that ship) and a pad of group orders.
- Formations: Wedge, Line Abreast, Column, Screen. A ghost of the formation follows your cursor; left-click to place it, right-click to cancel.
- Attack Left Flank / Attack Right Flank form a line beside the target. Focus Fire puts every ship on one target. Regroup on Leader forms up on your largest ship. Fall Back pulls each ship away from the nearest enemy.
- Stances: Hold, Aggressive, Passive. Aggressive ships hunt and engage on their own. Passive ships hold fire and do not pursue. Hold is the normal behaviour.
Weapons and shields
Ships have weight, momentum, turn rates and firing arcs. Big hulls hit hard, soak damage and turn slowly; small ones are fast, cheap and fragile. Guns lead their target, so a ship that keeps moving takes fewer hits.
Rail guns
The standard gun. Small hulls (XXS, XS, S) fire rails only, and their rounds are far more effective against other small hulls than against anything Medium or larger.
Torpedoes
The heavy punch of Medium and larger warships; small hulls and mining ships carry none. Broadside Salvo fires three at once from the flank facing the target.
Point defence
Capital ships carry the Point Defense Screen ability: for 10 seconds it launches interceptors that destroy enemy torpedoes and mines near the hull.
Shields, armour, hull
Damage hits the shield first, then armour, then hull. The shield regenerates after a short pause without hits. A ship dies when its hull reaches zero.
- No friendly fire, but allies block shots. A shot that meets one of your own ships stops there and does no damage, so keep your line of fire clear.
- Asteroids block shots from both sides, following the rock's real shape. Use them as cover.
- Hulls have weight. Ramming an enemy hurts both ships, the bigger hull hits harder, and a fighter bounces off a capital. Your own ships brake and steer around each other.
- Healer hulls repair damaged allies in range with a repair beam. The beam drains the healer's action points and stops when they run out.
Six abilities per ship
Three come with the hull (keys Z X C) and three you pick at fleet select (keys B N M). The keys fire the ability on every selected ship; the icons on a ship's box in the fleet bar fire it on that ship alone. Every ability costs action points (AP, the yellow bar, shown here as a share of the ship's full bar) and has a cooldown; a dimmed icon is recharging.
Reading the icons
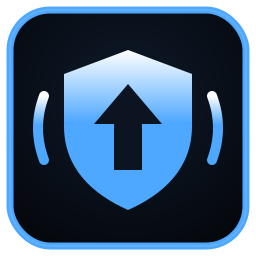 Rounded squareHull kit: comes with the ship
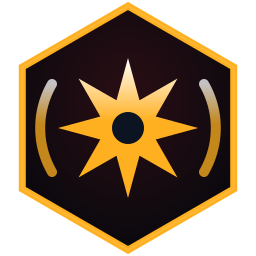 HexagonDebuff: you fire it at an enemy
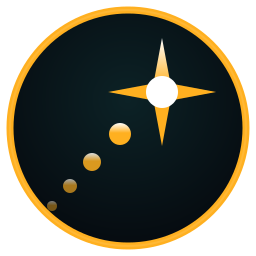 CircleCountermeasure: protects your own ship
- Shared colourA debuff and the counter that clears it are the same colour
Hull kit: Z / X / C
Which three a ship carries depends on its role. Most ships fly Shield Overcharge on Z and Afterburner on X; the third slot, C, is Broadside Salvo on medium and large warships, Evasive Maneuvers on small hulls (XXS, XS, S), Repair Field on healers and Magnetic Mines on bombers. Capitals, commanders and the titan trade Afterburner for Point Defense Screen and keep Broadside Salvo. Data runners carry Cloak, Mass Cloak and Hack instead.
-
Shield OverchargeZ
Every hull except data runnersRaises the ship's maximum shield by half (x1.5) for 8 seconds. Fire it just before a salvo lands.
-
AfterburnerX
Most hulls; Point Defense capitals and data runners swap it out1.6x speed for 5 seconds, but the ship turns at half its normal rate while it burns.
-
Broadside SalvoC
Medium and large warships, and capitalsFires three torpedoes at once from the flank that faces your target.
-

Evasive ManeuversC
Small hulls (XXS, XS, S), in place of Broadside SalvoDoubles the ship's turn rate for 6 seconds: enough to out-turn torpedoes and bigger hulls.
-
Point Defense ScreenX
Capitals, commanders and the titan, in place of AfterburnerFor 10 seconds, shoots down enemy torpedoes and mines that come within three hull radii of the ship.
-

Repair FieldC
Healer hullsMends every ally in repair range for 8 seconds, at 35% of the repair beam's rate. The healer's beam itself drains 3% AP per second.
-
Magnetic MinesC
Bomber hullsDrops three mines behind the ship. They drift onto any enemy within 1800 and explode on contact.
-
CloakZ
Data runners (Opal Rayfam, VZUS Opod)The ship vanishes from enemy screens, the enemy minimap and enemy targeting for 12 seconds; your side sees it as a ghost. A cloaked ship holds fire.
-
Mass CloakX
Data runnersCloaks every allied ship within 2500 for 20 seconds. Cloaked ships hold fire until it ends.
-
HackC
Data runnersLocks down your target, or the nearest enemy, within 2500 for 5 seconds: it cannot fire, use abilities or move. Hacking breaks your own cloak.
Picked abilities: B / N / M
Each hull type gets three more slots, chosen at fleet select from 16 status abilities: eight debuffs and eight countermeasures. Every copy of that hull uses the same picks. A debuff hits your ship's target, or the nearest enemy, within 3000. Each countermeasure clears one debuff from your own ship and blocks it for 20 seconds.
-
Kinetic
Cleared by
Concussive BarrageB N M
The target's torpedoes and rail guns hit 20% weaker for 18 seconds.
FlareB N M
Clears Concussive Barrage from your own ship and makes it immune to Concussive Barrage for 20 seconds.
-
Energy
Cleared by
Capacitor OverloadB N M
The target's shield does not regenerate at all for 20 seconds.
Energy CapacitorB N M
Clears Capacitor Overload from your own ship and makes it immune to Capacitor Overload for 20 seconds.
-
EMP
Cleared by

Drive ScrambleB N M
The target runs at 70% speed and cannot use Afterburner, Evasive Maneuvers or Cloak for 15 seconds.
Faraday ShieldingB N M
Clears Drive Scramble from your own ship and makes it immune to Drive Scramble for 20 seconds.
-
Superchill
Cleared by

Cryogenic LagB N M
The target regains no action points and fires 30% slower for 15 seconds.
Warming PlatesB N M
Clears Cryogenic Lag from your own ship and makes it immune to Cryogenic Lag for 20 seconds.
-
Shockwave
Cleared by
Countermeasure StaggerB N M
Pushes every one of the target's ability cooldowns back 8 seconds, and it turns 25% slower for 20 seconds.

Negative REM PlatingB N M
Clears Countermeasure Stagger from your own ship and makes it immune to Countermeasure Stagger for 20 seconds.
-
Gray goo
Cleared by

Nanite ContaminationB N M
Repairs on the target are 50% less effective for 30 seconds.
Healing NanobotsB N M
Clears Nanite Contamination from your own ship and makes it immune to Nanite Contamination for 20 seconds.
-
Heat
Cleared by
Weapon OverheatB N M
The target burns 35% more ammunition with every shot for 25 seconds.
Fire SuppressorB N M
Clears Weapon Overheat from your own ship and makes it immune to Weapon Overheat for 20 seconds.
-
Bomb
Cleared by
BreachB N M
The target takes 20% more damage to its hull for 20 seconds. Shield and armour damage is unchanged.
DecoyB N M
Clears Breach from your own ship and makes it immune to Breach for 20 seconds.
- Size matters. A debuff from a much smaller ship lasts less on a bigger one, down to 35% of its time. Equal or larger attackers get the full duration.
- No stacking. Hitting a ship with the same debuff again only extends it. When a debuff wears off, the ship is immune to that kind for 6 seconds.
Mining, ammunition and cover
- Every shot costs ammunition. The number on each ship's box in the fleet bar is its ammo. A magazine lasts under a minute of sustained fire, and a ship that runs dry fires at one eighth of its normal rate.
- Mining ships refill the whole fleet. Select a miner and right-click one of the big mineable rocks: it flies there, tethers and mines, and every allied ship regains ammo wherever it is on the map. A miner parked next to a rock with ore starts on its own. While a miner is selected, every mineable rock shows a green marker.
- Rocks run out and regrow. There is one mineable rock behind each fleet and a contested one between them. Move miners when a rock runs dry.
- Miners are targets. Any hit stops a miner for a few seconds; it resumes by itself. Ore mined also counts toward the result if the clock runs out.
- Asteroids are cover. Every rock stops shots against its real surface. Put one between your fleet and the enemy's guns.
Reading the battle screen
- Top centre
- The match clock and each player's fleet health bar, labelled with the player's name: your side on the left, theirs on the right.
- Pilot colours
- Your side flies blue, green and yellow; theirs purple, pink and brown. The colours show on hulls, group badges and the health bars.
- Fleet bar
- One box per ship with its ammo and control-group number. Click a box to select that ship; its ability icons fire that ship's abilities.
- Detail bay
- One ship selected: its stats. Two or more: the Command Table.
- Minimap
- Bottom right. Ships are dots in pilot colours, rocks are grey, and your view is outlined.
- LEAVE / HELP
- Top right. HELP opens the control list. LEAVE exits the match, and leaving a live battle forfeits it.
- V
- Toggle your microphone. Voice needs an Epic sign-in; the HUD shows MIC ON or MUTED.
Game modes
Single player
Title screen, Single Player: build a fleet and fight an AI fleet matched to your points. Works signed out too.
1v1 duel
Multiplayer, sign in with Epic, set yourself READY, then CHALLENGE a ready pilot in the lobby. They have 30 seconds to accept. Rated on the 1v1 ladder.
Squads
Form a squad of two or three in the SQUAD tab for 2v2 and 3v3, each with its own rated ladder. Each player commands only their own ships. Tick PLAY VS BOTS for a casual co-op match against one AI fleet per player.
Spectating
Open the MATCHES tab and press WATCH on a live match to enter it with a free camera (WASD, Q / E, wheel, right-drag). Spectators see the map and the fleet health bars and cannot give orders. Up to eight viewers per match; some matches cannot be watched.
Tips
- Tip 01
Bring miners
Magazines empty in under a minute of sustained fire and a dry ship fires at an eighth of its rate. Without miners, a long fight is lost.
- Tip 02
Guard your miners, hunt theirs
Any hit stops a miner for a few seconds. Small, fast hulls are ideal for harassing the enemy's miners; keep a screen near your own.
- Tip 03
Fight from behind rocks
Asteroids stop shots from both sides. Park a damaged ship behind one, or bait the enemy into firing through one.
- Tip 04
Keep moving
Guns lead their target. A ship that changes course or altitude (Space + wheel) makes the enemy's lead wrong.
- Tip 05
Let small ships do small-ship work
Fighters' guns shred other small hulls but barely scratch capitals. Use them to win the fighter fight and to carry debuffs; let torpedoes kill the big ships.
- Tip 06
Debuff big with big
A small ship's debuff lasts as little as 35% of its time on a larger hull. Give your heaviest debuffs to ships at least as big as their targets.
- Tip 07
Pick a counter for your weak spot
Think about which debuff would hurt your fleet most and carry its countermeasure. It clears that debuff and blocks it for 20 seconds.
- Tip 08
Spend AP on purpose
Every ability draws on the same AP pool, and a healer's beam drains it too. Save enough for Shield Overcharge before the enemy's salvo lands.
- Tip 09
Answer bombers with point defence
A capital's Point Defense Screen destroys incoming torpedoes and mines for 10 seconds. Time it against a Broadside Salvo or a mine drop.
- Tip 10
Clear your line of fire
There is no friendly fire, but your own ships still stop your shots. Spread out, or use a Line Abreast formation, before a broadside.
- Tip 11
Group early
Bind ships with Ctrl + 1 to 9 before contact. Double-tap the number to jump the camera to that group mid-fight.
- Tip 12
Play the clock
On time, damage is scored against what the enemy brought and ore counts for 30%. A fleet that only hides at a rock will not win on ore alone.